- HomeX Magazine
- Kitchen Remodels
- Painting kitchen cabinets, from the lead check to cure time
Painting kitchen cabinets, from the lead check to cure time
Painting kitchen cabinets updates a room on a budget, requiring careful preparation from initial lead checks and sanding to final coats and curing times.
Words by Thaddeus Yarbrough
- 7 minute read
Painting kitchen cabinets can give a lasting finish at a lower cost than replacing the boxes and doors. The process takes patience to do right. Success relies on careful cleaning, thorough sanding and a long curing period before the doors go back on.
Check old paint for lead
Old layers of paint often hide under a fresh coat. The federal government banned lead based paint for homes in 1978, and about three quarters of homes built before then still contain some of it. Testing the surface with a lead test kit from a local hardware store is a sensible first step.
Cut a small notch through the old layers to expose the base coats before rubbing the swab across the groove. Follow the kit's instructions to read the result, and treat any positive result as lead paint. The EPA Renovation, Repair and Painting Rule generally does not cover homeowners working on their own pre 1978 homes, but it does cover rentals, so the EPA recommends lead safe work practices for do it yourself jobs.
Sanding or scraping lead paint creates dust that can spread through a house. If the test shows lead, follow lead safe work practices as the EPA recommends, or ask a certified lead safe contractor. Painting over intact lead paint with primer and paint can help contain it, as long as the old finish is not peeling or chipping.
Label the doors and set up a workspace
Cabinet doors look identical until you try to hang them back in the wrong spot. Numbering every door and drawer front prevents confusion later. Write a number on a piece of tape and stick it inside the hinge hole. Write the matching number on a piece of tape inside the cabinet box.
Start numbering at the upper left cabinet and move clockwise around the kitchen to build a clear map. Remove all the hinges, pulls and knobs. Put the hardware for each door into its own small plastic bag with the matching number. Taking the hinges off the frames makes painting the boxes much easier.
Soaking dirty hinges in warm, soapy water removes years of grime while you paint the boxes. Reattaching the hardware later provides a good opportunity to reconsider cabinet pulls and knobs.
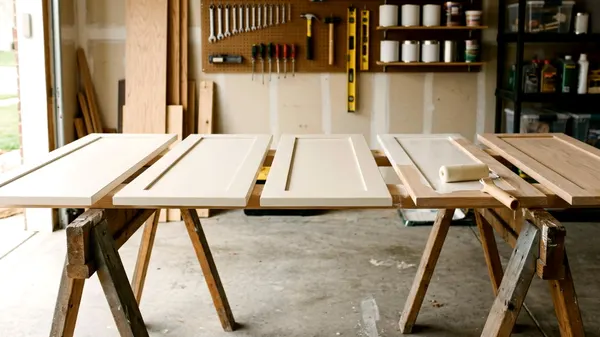
Find a dry space with good airflow to hold the doors while they cure. A garage or a spare room works well. Set up sawhorses or folding tables to hold the doors flat while you paint.
Lay drop cloths over the floors and tape plastic over the kitchen countertops to catch drips. Mask off the appliances and the floor where they meet the lower cabinets.
Degrease and sand every surface
Paint will not stick to kitchen grease. Cooking oils and fingerprints coat cabinet doors over time, especially near the stove and the sink. Washing the wood with a strong degreaser removes that hidden layer. Read the degreaser's label for safety directions such as gloves and ventilation.
Scrub the fronts, the backs and the edges with a coarse sponge. Rinse the wood thoroughly with a separate bucket of clean water and let it dry completely. Leftover degreaser can keep the primer from bonding.
Sanding gives the new primer something to grip. Use a fine sanding block or fine sandpaper to scuff the old finish. The goal is removing the shine, not taking the wood down to bare timber. Focus on the areas around the handles where daily wear leaves the surface uneven.
A random orbital sander speeds up the flat panels. A foam sanding block reaches into the grooves of raised panel doors. Wipe the dust away with a damp cloth or a tack rag. Fill any dents or old hardware holes with wood filler.
Use a putty knife to press the filler into the gap and scrape the surface flat. Let the filler dry and sand it smooth. Wipe the dust away one more time before opening a can of primer.
Prime for wood, laminate or thermofoil
The right primer bonds the paint to the specific cabinet material. Bare wood requires a stain blocking primer. Tannins in woods like oak or cherry bleed through water based paint. This leaves yellow marks on the finished surface.
An oil based primer or a synthetic shellac seals the wood and blocks those stains. Oil primer smells strong, so follow the label's ventilation directions and keep fresh air moving while you work.
Laminate cabinets have a slick plastic surface that repels regular paint. A bonding primer sticks to the plastic and creates a dull, chalky surface for the topcoat. Sanding the laminate thoroughly before priming helps the primer hold.
Thermofoil cabinets feature a vinyl layer heated and molded over medium density fiberboard. Peeling vinyl requires replacing the doors entirely. If the damage spreads too far, you might need to decide which kitchen cabinets to choose for a larger remodel. Intact thermofoil takes paint well after a light scuffing and a coat of bonding primer.
Tinting the primer gray helps darker topcoats cover the surface with fewer layers. Lightly sanding the dry primer with fine sandpaper knocks down any raised wood grain. Wipe the dust away again to leave a perfectly smooth base for the colored paint.
Apply thin coats for a smooth finish
Thin layers of paint prevent drips and dry to a hard shell. Cabinet enamels and acrylic urethanes level out as they dry, masking minor brush strokes. Heavy paint pools in the corners and runs down the edges.
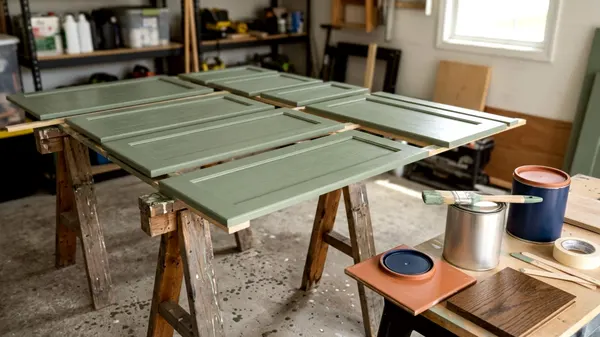
Two thin coats usually beat one thick coat. Wait for the first coat to dry completely before starting the second.
Brush and roll the frames
Start with the cabinet boxes in the kitchen. Use an angled brush to cut in around the edges and a small foam roller to cover the flat sides. Foam rollers leave an even surface with fewer marks than thick nap rollers.
Keep a wet edge by rolling back into the paint you just applied. Working in small sections prevents the paint from getting tacky before you finish the side.
Moving to your workspace, paint the backs of the doors first. Brushing the recessed panels before rolling the flat sections pushes the paint into the corners. Let the back dry fully before flipping the door over to paint the front.
Prop the doors on small plastic painter pyramids to keep the edges off the table. Painting the back first means any accidental smudges on the flip side happen on the less visible surface.
Spray the doors to avoid brush marks
A high volume low pressure sprayer lays down a fine mist of paint. Spraying takes more preparation but leaves no roller texture behind. Thin the paint only as the label directs to get the right flow. Practice on a large piece of cardboard to dial in the spray pattern.
Adjust the nozzle until the paint forms a fine, even oval. Set up a spray tent in the yard or an empty garage to contain the mist. Keep the nozzle moving and sweep past the edges of the door to avoid pooling.
Overlap each pass to get an even coat. Wear the respirator and eye protection the paint label calls for when spraying.
Let the paint cure before rehanging
Paint can feel dry to the touch well before it is hard underneath. Curing can take weeks as the paint hardens into a durable shell, so check the label for its cure time. High humidity and cold temperatures stretch that timeline out even further.
Moving too fast ruins the smooth surface you just built. Hanging soft doors causes them to stick to the cabinet frames. When you pull the door open, the fresh paint peels right off the wood. Leave the doors flat in your workspace until the label's cure guidance says they are ready to rehang.
Load the shelves carefully once the doors go back on. Heavy plates and sharp pans easily gouge fresh paint. Pushing small clear bumpers into the corners of the doors keeps them from slapping against the frames.
These bumpers provide a tiny gap that helps stop the paint on the door from fusing to the paint on the box.
Fix drips and chips after the paint hardens
Even careful painters find a few drips or sags. Trying to wipe away wet paint creates a messy smear that takes more work to fix. Let the mistake dry completely along with the rest of the coat. A fresh cabinet color often sparks kitchen backsplash ideas, but finish the doors before tearing into the walls.
Once the drip cures, slice the thickest part off with a sharp razor blade. Sand the remaining bump flat with fine sandpaper. Dab a small amount of paint over the spot with a brush and let it blend in.
Daily cooking and cleaning eventually chip the finish. Keep a small jar of the leftover paint in a cool, dark closet for touch-ups. Dabbing the chip with a small artist brush hides the damage without repainting the whole door.
Wait a few days for the touch up to dry, then blend the edges lightly with fine sandpaper. Wash the cabinets with mild soap and water to keep the finish looking bright for years. Avoid harsh chemical cleaners that strip the shine from the enamel.