- HomeX Magazine
- Kitchen Remodels
- What size and where to put kitchen cabinet pulls and knobs
What size and where to put kitchen cabinet pulls and knobs
Choose the right size kitchen cabinet hardware and place every knob or pull exactly where it belongs for a balanced and beautiful room.
Words by Thaddeus Yarbrough
- 7 minute read
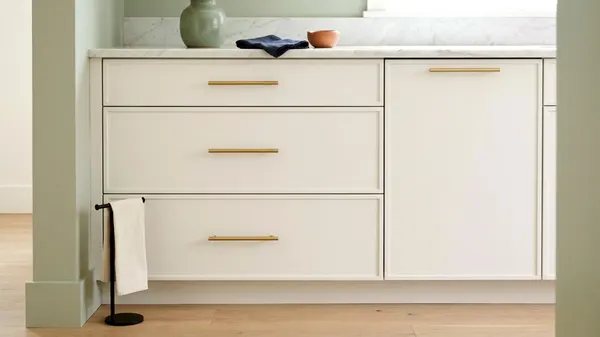
Kitchen cabinet hardware belongs on the side of a door opposite the hinges, while drawers take a pull right in the middle of the face. You can mix styles or keep the same look across the room. A pull often looks right at about a third of the drawer width.
Choose pulls, knobs or edge styles for each cabinet
Pulls are easy to grab with your whole hand, which makes them perfect for drawers holding heavy pots and pans. You pull straight out to slide a heavy drawer open. Knobs need only a couple of fingers to pinch and pull, working well on standard cabinet doors. Since doors swing outward on hinges, they take very little effort to move.
Many kitchens pair knobs on every door with pulls on every drawer to give the room a classic, balanced look. You get the function of a sturdy pull where you need it most. Small knobs keep the upper cabinets from looking too heavy.
Pulls on every door and drawer give a modern look with bold straight lines. Knobs everywhere give a softer, vintage feel, but small knobs on heavy drawers are tough to grip with wet fingers.
Edge pulls offer a third option for sleek modern homes. These metal pieces mount to the very top edge of a drawer and drop down to form a hidden ledge. Your fingers grip the underside perfectly. Edge pulls leave the flat face of the cabinet wood completely bare.
Match the hardware size to the door or drawer
Cabinet width tells you exactly what size hardware to pick for a balanced look. A pull often spans roughly a third the width of the drawer it sits on. This proportion looks balanced and spreads the pulling force across the face.
A small drawer needs only a single knob or a very short pull. Extra wide drawers need more help. You can install one extra long pull across a wide drawer face to give yourself plenty of grabbing room. Another option is putting two smaller pulls on a single wide drawer, mentally dividing the wood face into thirds to place them evenly.
Operating two pulls requires you to use both hands at once. Pulling just one handle may twist a loaded drawer on its tracks over time, and a single long pull avoids that.
Cabinet doors typically take standard interior pulls or simple knobs. Tall pantry doors are the clear exception to this basic rule. A standard pull looks completely lost on a massive piece of heavy wood. Tall pantry doors often look right with thick appliance pulls that match the scale of the door.
Read center to center spans and projection spaces
You need to know the exact center to center span before replacing any old pulls. This measurement is the distance between the two drilled screw holes. You measure straight from the middle of one hole to the middle of the other.
This standard spacing dictates whether a new pull will fit your existing holes. Hardware companies manufacture pulls in standard center to center spans that rarely match the overall length. The metal ends almost always stick out past the mounting screw posts. You cannot rely on the total length of a pull to find a matching fit.
Taking an old pull off the door lets you measure accurately between the empty screw holes. Write this span down on paper. You will use this exact spacing to shop for direct replacements. Since knobs only require a single hole to mount, you never have to worry about spacing.
Projection is another hardware detail to check before you buy. Projection measures how far the handle sticks outward from the flat wood surface. A shallow projection leaves very little room for your fingers behind the metal, while deep projection gives your knuckles plenty of clearance. You want enough room to grab the metal firmly without scratching the cabinet face.
Where to place hardware on doors and drawers
Base cabinets and upper cabinets require entirely different hardware placements. You want to reach everything easily without bending down too far or stretching onto your toes.
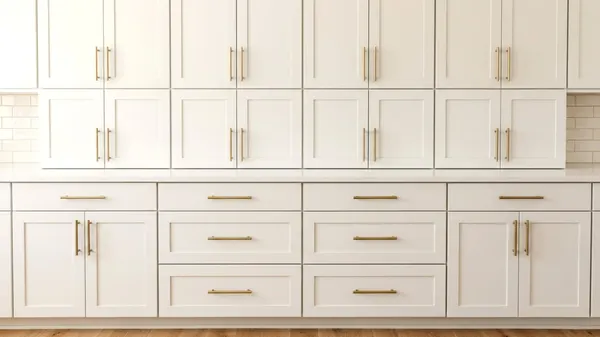
Upper cabinet doors need hardware placed firmly in the lower corner. You put the knob or pull on the side opposite the hinges and move it up slightly. Base cabinet doors take hardware in the upper corner instead. You place the handle opposite the hinges and bring it down a short distance from the top.
Drawers give you a few different choices for handle placement. The most common spot is directly in the center of the solid drawer face. You measure from top to bottom and left to right to find the center, marking the exact middle with a pencil. This centered placement works wonderfully for simple flat drawer fronts.
Some drawers have a raised wooden border called a shaker style. You can easily center the hardware on the flat recessed middle panel. Another valid choice for shaker drawers is the top rail. Mounting the pull horizontally on that thick top border piece keeps you from bending down as far.
Tall pantry cabinets require a completely custom mounting height. You do not place the handle near the very top or the very bottom of the door. Stand in front of the tall cabinet and reach your arm out comfortably, marking where your hand naturally lands on the wood. Placing the hardware at that exact height makes the heavy door much easier to pull open.
Use a template so every hole matches exactly
A cabinet hardware template is a stiff piece of plastic covered with small guide holes. It helps you drill holes in the exact same spot on every single door. Measuring and marking every cabinet by hand eats up hours of time. Hand measurements also invite mistakes.
You line the plastic template up flush with the corner of your cabinet door. Then you choose the specific guide hole that perfectly matches your hardware span. You use a sharp pencil to mark the wood right through the template hole. Drilling your fresh holes directly over those pencil marks keeps the fit consistent.
The template keeps every handle at the same height across a row of cabinets. Hardware stores sell simple plastic templates in the hand tool aisle. You can also make a reliable custom template out of thick cardboard.
Tape the spot before you drill. You put simple masking tape over the pencil mark and draw a new dot on the tape. The tape stops the fragile wood veneer from splintering when the drill bit finally bites in. Clamping a scrap piece of wood behind the door helps protect the back, letting the drill bit push cleanly into the scrap wood instead of blowing out the back panel.
Finish choices that match faucets and lighting
Kitchen cabinet hardware should look intentional, and the metal finish ties it to the rest of the room. You can easily match your pulls to your main kitchen faucet for a unified look. A brushed nickel faucet pairs beautifully with brushed nickel cabinet handles.
You can also look up at your ceiling light fixtures for inspiration. Dark black pendant lights hanging over a kitchen island look fantastic with black cabinet pulls.
Mixing different metal finishes adds great character to a kitchen. You want to pair warm metals with cool metals to create a sharp, deliberate contrast. Warm brass pulls look good next to a cool matte black faucet. Bright silver pulls provide a crisp contrast to dark bronze lighting overhead.
Many designers stick to two metal finishes in one room. Mixing too many metals together can easily make a kitchen look accidental and messy.
Before you buy hardware, it helps to narrow down which kitchen cabinets fit your space best. Your cabinet color heavily influences which metal finish looks best in the room. Dark blue cabinets make shiny gold hardware stand out. Bright white cabinets look crisp paired with dark iron handles.
Fill and redo holes when you change styles
Sometimes you want to swap tiny pulls for much longer ones. The new screw holes will not line up with the old ones. You must cover up the original holes completely before you drill new ones.
Wood putty works perfectly for patching holes on painted cabinets. You push the soft putty into the empty screw holes and let it dry hard. Putty can shrink as it dries out, so you might need to add a second layer of putty to fill the hole completely flush. Then you rub the patched surface with fine sandpaper until it feels totally smooth.
You touch up the dull sanded spots by painting kitchen cabinets with a perfectly matching color. The old empty holes vanish entirely from sight.
Stained wood cabinets are much harder to patch cleanly. Wood putty rarely absorbs liquid stain the exact same way natural wood grain does. A patched hole on a stained wood cabinet often leaves a visible spot behind.
Backplates offer a clever physical solution for stained wood doors. A backplate is a flat piece of decorative metal that sits tightly trapped between the cabinet door and the base of the new handle. The solid metal plate covers up the old screw holes completely. You just drill fresh holes through the wood for your new hardware to fit, while the wide backplate hides the old holes.
This trick saves you from trying to match faded wood stain perfectly. You can easily match the backplate finish to your shiny new hardware. A beautiful patterned backplate can even inspire new kitchen backsplash ideas by adding a decorative metal touch.