- HomeX Magazine
- Bathroom Renovations
- 11 small bathroom ideas that add space without moving walls
11 small bathroom ideas that add space without moving walls
Find small bathroom remodel ideas that add space without moving walls. Discover practical ways to upgrade fixtures, lighting and bathroom storage.
Words by Thaddeus Yarbrough
- 7 minute read
Expanding the footprint of a tight bathroom requires major structural work. You can make the existing square footage look and feel much larger by swapping out specific fixtures and rethinking the storage. These small bathroom ideas clear up floor space and bounce light around the room.
1. Swap a swinging door for a pocket or outswing door
A standard interior door eats up a large chunk of floor space just to swing open and shut. Changing the door to swing out into the hallway reclaims that lost footprint for the bathroom. A pocket door slides into the drywall and disappears entirely. That lets you place a wider vanity or a deeper storage cabinet near the entrance.
Installing an outswing door can be as simple as moving the hinges and door stop, though a pro can confirm it suits your hallway and local building code. A pocket door involves opening up the adjacent wall and installing a track system. Both options keep the door from knocking into the vanity or the toilet. Pocket doors require a wall cavity clear of plumbing pipes and electrical wires.
2. Use a glass shower panel instead of a curtain
A dark fabric curtain cuts a room in half and blocks light from reaching the shower enclosure. Replacing the curtain with a clear glass panel opens up the sightlines across the whole room. The eye travels straight to the back wall and makes the space feel deeper. The light from a nearby window can now illuminate the shower tile directly.
A fixed pane of tempered glass keeps water inside the wet zone while leaving the entrance open. A hinged glass door works well if you want a fully enclosed shower space. Glass cleans easily with a squeegee and eliminates the need to wash a fabric liner. You can treat the glass with a water repellent coating, following its label, to help reduce hard water spots.
3. Choose a wall-hung toilet or a compact one
Standard toilets project far into the room and disrupt the walking path. A wall-hung toilet hides the bulky water tank inside the wall, and a licensed plumber should handle the install. Only the bowl and the flush plate remain visible, which clears the floor totally underneath and leaves the surrounding floor tiles uninterrupted.
A compact round bowl toilet is a simpler alternative that requires much less installation work. It sits on the floor but uses a smaller tank and a shorter bowl to save depth. This frees up the walking path in front of the bowl. Round bowls save inches compared to an elongated model.
4. Recess a niche or a medicine cabinet between studs
Storing items on the counter makes a tight vanity feel even smaller. You can push storage into the gaps between the wall studs rather than hanging boxes on the surface. A recessed medicine cabinet provides hidden shelves for daily items right at eye level. This keeps your toothbrush and face wash handy but completely out of sight.
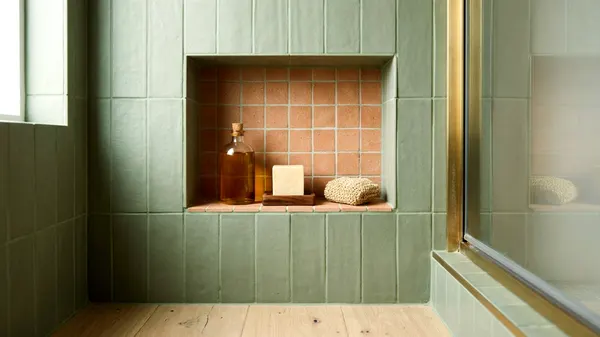
A tiled wall niche in the shower replaces bulky wire caddies and protruding corner shelves. Check the wall for pipes, wires and framing first, since the space between studs often has enough depth for tall shampoo bottles and bar soap. You gain storage without cluttering the standing area. Planning the niche placement carefully ensures the cut aligns perfectly with the surrounding grout lines.
5. Pick large tiles and one light color
Tiny tiles require many grout lines that create a busy grid pattern across the room. Large format tiles minimize the grout joints and give the floor and walls a smooth surface. Fewer visual interruptions help a tight area feel expansive.
Matching the tile color to the painted walls blurs the boundaries of the room. Pale shades reflect more light than dark colors and make the corners recede. A continuous sweep of a single pale color prevents the eye from stopping at the edges. Carrying the same light tone onto the ceiling pulls the gaze upwards and maximizes the feeling of height.
6. Install a floating vanity to show more floor
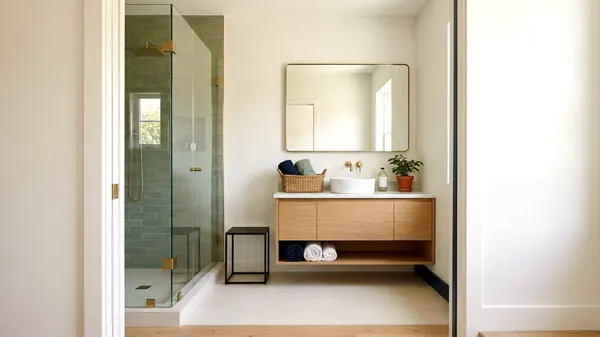
A vanity cabinet that sits directly on the floor feels heavy and blocks off a corner of the room. A floating vanity attaches to the wall and leaves a gap of empty space underneath. Seeing the floor tile continue under the cabinet creates an illusion of extra square footage.
You still get enclosed storage for towels and supplies inside the vanity drawers. Adding baskets under the floating unit provides extra capacity if you need it. Finding the right size for your vanity depends on the clearance you need for the door and the toilet. Make sure the cabinet drawers have enough room to open fully without hitting the opposite wall.
7. Add vertical storage above the toilet
The empty wall space directly over the toilet tank often goes entirely unused. Installing floating shelves here takes advantage of the vertical room without eating into the walking path. Solid shelves hold extra toilet paper rolls and neatly folded towels. Baskets and bins on these shelves gather loose items and maintain a tidy appearance.
An enclosed cabinet above the toilet hides colorful packaging and clutter behind solid doors. Mounting the storage high enough helps keep anyone from bumping their head while standing up. Keeping items off the floor makes the whole room easier to mop and sweep. Anchoring into wall studs, as the cabinet's instructions say, helps it hold heavy bottles safely.
8. Mount lights at the mirror, not only overhead
A single ceiling fixture casts harsh shadows downwards and makes the room feel cramped. Adding light sources at the vanity brightens the walls and provides even illumination for shaving or applying makeup. Wall sconces mounted on either side of the mirror, in fixtures rated for bathroom use and wired by a licensed electrician, cast a flattering glow across the face. Spreading the light sources out brightens up the shadowy corners effectively.
You can choose wall sconces that match the metal finish on your sink hardware. A lighted vanity mirror is a sleek alternative if you lack the wall space for separate sconces. Adding dimmer switches allows you to adjust the brightness based on the time of day.
9. Mount the faucet on the wall to save counter depth
A standard deck mounted faucet sits behind the sink basin and requires a deep vanity top. Moving the faucet to the wall allows you to use a much narrower sink and a shallower cabinet. This frees up precious floor space in the middle of the layout. You gain extra room to dry off after a shower without bumping into the vanity edge.
Wall-mounted faucets require the plumbing pipes to run behind the drywall instead of up through the vanity floor. This takes extra planning and a licensed plumber during a remodel but can pay off with a clean and minimalist look. The setup also makes wiping down the counter easier. You avoid scrubbing grime from around the base of the faucet handles.
10. Extend the floor tile into the shower
Changing the flooring material at the shower edge visually chops the room into smaller distinct zones. Running the exact same tile from the bathroom door straight through to the back of the shower unifies the space. This continuous surface tricks the brain into seeing a single uninterrupted area. The eye naturally sweeps across the floor without hitting a visual barrier.
A curbless shower design enhances this effect by removing the raised threshold entirely. Sloping the floor gently toward a linear drain can keep water contained without a physical barrier, but it needs careful waterproofing by a qualified pro. This layout trick removes visual boundaries and opens up the floor. Curbless showers can also reduce a tripping hazard and make the room more accessible.
11. Add a large wall mirror to bounce light
Mirrors expand the visual depth of a space by reflecting the opposite wall and the light sources. A small mirror over the sink only serves a practical purpose. Replacing it with an oversized mirror stretches the boundaries of the room. A frameless design helps the glass blend into the wall and enhances the illusion of a larger room.
You can run a custom cut mirror from the backsplash all the way up to the ceiling. You must hang the large mirror securely against the studs to handle the heavy weight of the glass. Positioning the glass opposite a window or a bright fixture creates the strongest enlarging effect. The reflection bounces natural light into the darkest parts of the room.
How to prioritize small bathroom remodel ideas
Changing out every fixture and surface at once requires a total gut remodel. You can improve the room in stages by picking the projects that solve your biggest daily frustrations. Swapping a door swing or replacing a shower curtain is a smaller job than the rest and may need only basic hand tools. Small changes to the lighting also make a massive difference without tearing up the floors.
Upgrading to a wall-hung toilet or recessing a medicine cabinet involves cutting into the drywall and rerouting plumbing. These jobs make sense when you already plan to open the walls to fix leaks or update the wiring. Match the scope of the work to the time you have available and the disruption you can tolerate.