- HomeX Magazine
- Floors and Layouts
- How to pick a wood stain color for floors and trim
How to pick a wood stain color for floors and trim
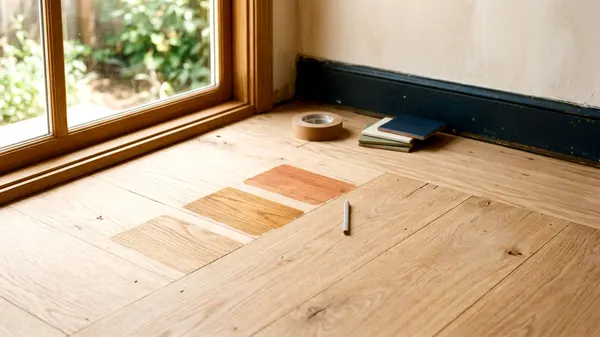
Finding the right wood stain colors for your floors and trim means testing samples on bare boards to check the undertones in your own home's lighting.
Words by Pilar Whitaker
- 7 minute read
Picking wood stain colors requires brushing sample patches onto your sanded floorboards and watching how they dry. Your final color depends entirely on your specific wood species and the lighting in your room. Test three or four options in place before you commit to a house full of dark walnut or pale oak.
How wood species change the stain color
Wood acts like a giant sponge. Different tree species absorb liquids in completely different ways. A color swatch on a tin of stain shows a generic piece of perfect timber. Your actual floorboards will shift that color heavily toward their own natural base.
Red oak has distinct pink undertones and very open pores. Dark pigments catch in the heavy grain and highlight every line. White oak is dense with yellow or subtle green undertones. It takes stain smoothly and accepts gray tones well.
Pine is soft and uneven. A dark stain wiped onto bare pine often turns blotchy. Softwoods need a pre-stain wood conditioner to soak up the color evenly.
Maple is extremely dense and fights absorption at every turn. Staining maple dark can end in a muddy finish. It tends to look best with a pale tint or a clear coat.
You have to identify your wood species before buying a stain. Look at the grain patterns in bare light. Old floors sometimes hide replacement boards from a different species. A patch of white oak woven into a red oak floor will show up once you apply a colored stain.
Choosing light, medium and dark stains
Dark floors ground a large, bright space. They create a formal foundation for your furniture. A heavy espresso shade can help conceal patches in an older floor.
Dark floors also need frequent cleaning. They show every speck of dust, fallen pet hair and dusty footprint.
Medium stains offer a highly forgiving surface for daily living. A warm chestnut or medium brown often hides dirt well. Medium shades feel cozy and traditional.
They bring warmth to a stark white house without demanding constant sweeping. Scuff marks blend right into the background.
Light stains make spaces feel open. They bounce sunlight around the house. A pale floor is an easy way to make a small room feel bigger. Scratches disappear into a light grain.
Pale ash or whitewashed tones fit well in a relaxed coastal house or a minimalist interior. Light floors show dark mud and spilled coffee quickly, but they tend to hide general dust.
Think about the ceiling height in your home. A dark floor with a low ceiling makes a room feel compressed. A light floor opens up that exact same space. Your cleaning habits and your room size should dictate the depth of your stain color.
Matching warm and cool undertones to your walls
Wood stains carry warm, cool or neutral undertones. You have to match these tones to your wall paint. A clash between a cool floor and a warm wall ruins the flow of a room.
Warm stains pull red, orange or yellow to the surface. They suit traditional rooms and pair beautifully with creamy white walls. Cherry, mahogany and warm amber tones make a large space feel inviting.
Cool stains lean heavily toward gray, green or stark black. They fit modern construction and look sharp against cool blue or gray walls.
Neutral browns sit right in the middle. They lack any strong red or gray influence. A true, flat brown works with nearly any paint choice.
Hold a stained wood sample directly against your baseboards. Step back and look at the contrast. You can build a whole house color combination around a strong floor color, but it takes planning.
Natural light changes these undertones drastically. Southern windows wash a room in warm, golden sunlight. That light pulls the yellow out of a neutral stain. Northern windows cast a cool, bluish light that makes a gray stain feel icy.
Testing samples on the floor in your lighting
You cannot pick a floor color from a hardware store brochure. You have to test liquid stain on your actual boards.
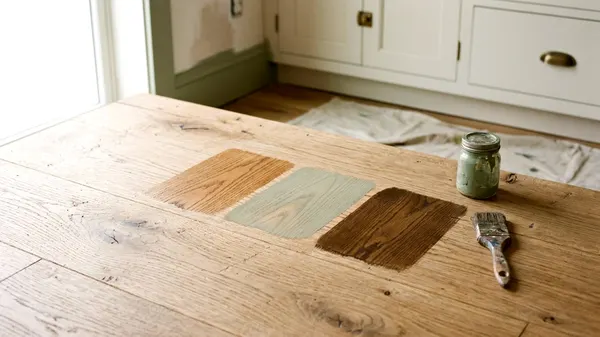
Pick an inconspicuous spot in the room. Sand a small section of the floor down to bare wood. Apply a few distinct shades side by side. Use a rag to wipe the stain on and wipe the excess off, and check the can's label for how to dispose of used rags.
Wait for the test patches to dry. Apply a single coat of the exact clear finish you plan to use over the whole floor. Topcoats change the stain color immediately.
Oil-based finishes tend to add an amber glow, while water-based finishes tend to dry clearer, so test the one you plan to use.
Watch the patches throughout a full day. Look at them with your morning coffee. Check them again at noon when the sun hits the boards.
Turn on your lamps at night and see how artificial light shifts the tone. Shadows deepen the corners of a room and make dark stains look black.
Live with the test squares for a few days. Ask your family what they think. Once you pick the winner, sand the test patches away completely. You must return to raw wood before starting the main job.
Coordinating floors, trim and furniture
Wood tones in a single room need to coordinate. They do not need to match exactly. An exact match across floors, baseboards and wooden furniture makes a room feel flat and heavy.
Pick a dominant wood tone for your floor. Treat this as the base layer. Choose an accent wood tone for your heavy furniture and door casings.
If the floor is extremely dark, keep the window trim and baseboards lighter. White painted baseboards create a sharp break between a dark floor and dark furniture. Painted moldings give a plain room some character while separating competing woods.
Old houses often feature wide, unpainted trim. Staining new floors to match century-old baseboards takes patience. Old wood develops a natural patina that fresh stain cannot easily replicate.
If your dining table is a warm cherry, a cool gray floor creates a harsh contrast. A neutral brown floor lets the cherry pieces stand out without fighting them.
You can mix warm floors with cool furniture if you bridge the gap. Throw down a large rug. A textile break separates the woods and stops the eye from comparing them directly.
Try to keep the wood species consistent if the colors differ. An oak floor pairs well with an oak table, even if one is dark and one is light. Mixing heavily grained oak floors with smooth maple trim and knotty pine cabinets creates a chaotic look.
Clear and natural finishes as an alternative
Sometimes the best stain choice is no stain at all. Bare wood holds plenty of natural character. A clear sealer protects the boards while showing off the authentic grain.
Water-based polyurethane tends to dry clear. It keeps the wood looking raw and light. This is an excellent choice for a modern, airy space.
Oil-based polyurethane deepens the natural tone of the wood immediately. It gives raw boards a rich, honey glow.
Skipping the stain saves a massive amount of labor. You bypass an entire day of applying color and wiping up excess pigment. You also avoid the risk of blotchy stain.
Premium wood species deserve a clear coat. If you have beautiful raw walnut, rich mahogany or pristine clear maple, a colored stain covers up the natural variations.
Save the heavy, dark stains for hiding damage on older, mismatched oak floors.
Planning for sanding and cure time
Stain only penetrates completely bare wood. Old varnish blocks the new color from soaking in. You must sand away every trace of the previous finish.
Sanding requires heavy drum sanders and edge grinders, which a licensed pro can handle if you have not used them. You have to step through multiple grits of sandpaper. Removing all previous scratches is strictly required. Any rough spot drinks up extra pigment and turns noticeably dark.
Dust is the enemy of a smooth finish. Vacuum the bare boards thoroughly. Wipe them down with a tack cloth to catch the finest dust particles. Any debris left on the floor gets trapped under the stain.
Apply the stain evenly across the room. Work in small sections. Wipe off the excess liquid before it dries. A heavy rag removes the unabsorbed pigment and leaves a smooth color behind.
Let the newly stained boards dry completely. Applying a clear topcoat too soon pulls the wet stain back up. The color smears across the floor and ruins the job.
The final topcoats need significant time to cure. Keep pets and bare shoes off the floor.
Check the finish label for when you can walk on the floor in socks, since dry to the touch is not the same as cured. Dragging a chair or dropping a tool ruins a soft, uncured finish. Wait until the label says the finish is fully cured before rolling out heavy area rugs, because a rug can trap moisture and slow hardening.